How should you start a trim pass?
Choose an edge you can see clearly and identify the selected trim before placing another section. Build 443 changes several interactions, so an older tutorial may describe a different selection sequence. Read the control hints at the bottom of your installed game before repeating an old shortcut.
The official notes describe Fast Trim Placement as a way to reduce clicking. They also allow dragging to rotate the mannequin while trim is being placed. These changes help you inspect an edge without finishing the entire border blind. They do not establish a fixed number of clicks for every shape or a guaranteed solution around sleeve cuffs, which the developers still describe as a difficult interaction.
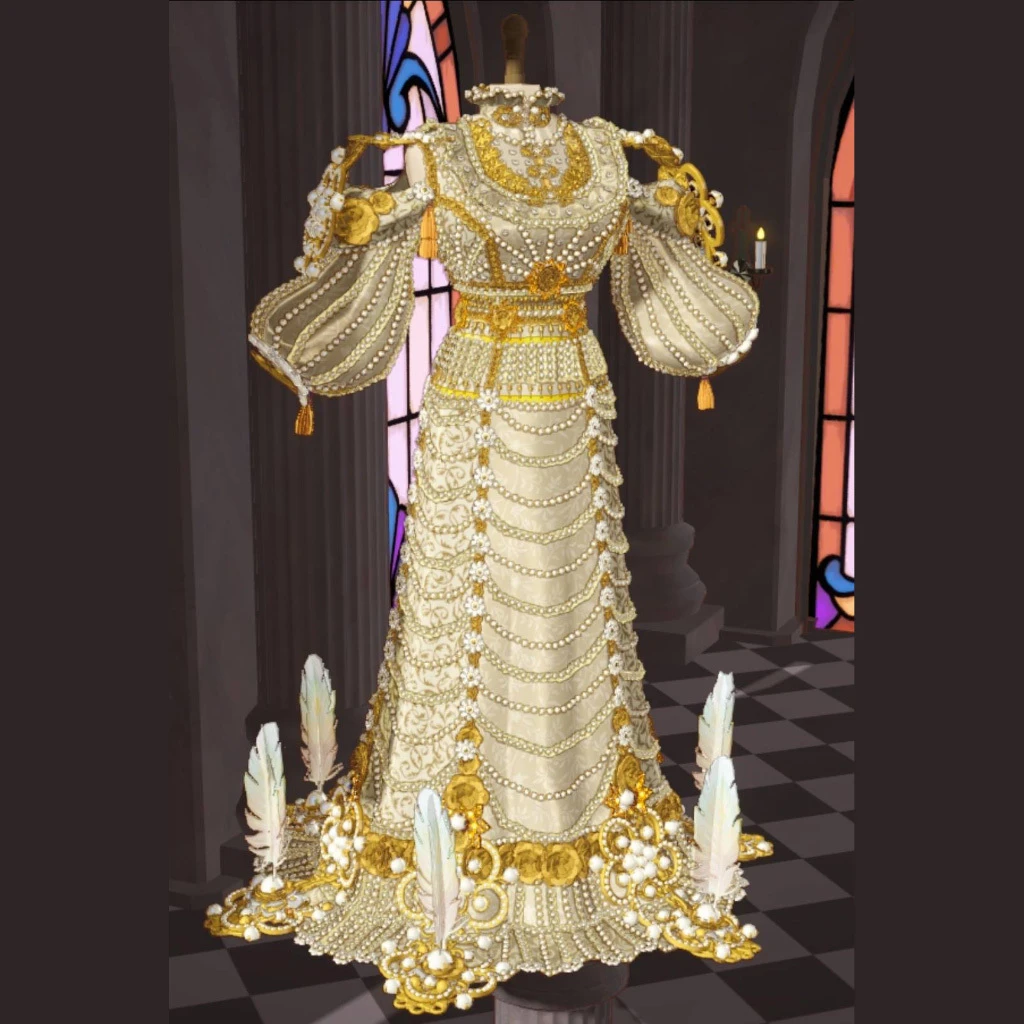
Read the layered edges in this real pre-release player creation before planning a trim pass.
- The cream-and-gold image has several repeated edge details across the upper and lower areas.
- Inspect one boundary at a time; this photograph does not identify the trim names or prove a cuff fix.
Pre-release media published July 28, 2026. This image does not establish the Build 443 interface or item unlocks.
July showcase creators: blueisasome, Ser Wobbles the Wobbly, DannyMothHere, MothIn30Seconds, CoffeeClearwingMoth, nanda, Wilt and Eli; published by Cozy Lives / Free Lives
Read the original publicationWhich actions are confirmed in Build 443?
| Action | What the patch confirms | What to inspect afterward |
|---|---|---|
| Select an existing trim | Click an end node | Is the intended piece selected? |
| Extend it | Click that end node again | Does the new section follow the intended edge? |
| Continue placement | Selection remains after placing | Are you continuing the same piece intentionally? |
| Duplicate | A button starts a piece with the same height, size and tilt | Check position and orientation separately |
| See the far side | Drag to rotate while placing | Look for clipping behind the visible edge |
The duplicate button transfers the settings named in the notes. The announcement does not promise automatic symmetry, matched length or attachment to an opposite sleeve. If you want a balanced pair, inspect the second piece instead of assuming duplication has mirrored it.
How can you separate position, height and tilt problems?
First stop adding new sections. Rotate the mannequin until you can see where the trim meets the fabric. Describe the problem in one sentence: the whole piece is offset, a section enters the garment, or one end points away from the edge. That description gives the next adjustment a purpose.
The update allows negative trim heights and fixes default tilt offsets on certain trims. A negative value is an available control, not a recommended value for every garment. Make a small adjustment, return to the same view and compare. Changing several settings at once can hide which one affected the intersection.
For simple accessories, the rotation gizmo also has movement buttons. Holding Control changes its rotation frame from the mannequin to the accessory. These are accessory controls described by the patch; do not assume every trim action uses the same gizmo. Check the selected object and the visible hint.
What should you check before calling an edge finished?
- Inspect the start and end of the piece from a close view.
- Rotate to the side or back and look for a section hidden inside the dress.
- Return to a wider view and check whether the border supports the whole silhouette.
- Read the commission progress if the trim is supposed to satisfy a condition.
- Keep the selected item name and build with any screenshot of a persistent fault.
This is an editorial inspection sequence. It is not a published game scoring rule. A clean border can still use the wrong counted category. The lace requirement guide explains why lace fabric and lace trim must be checked separately. The commission ledger keeps accessory counts separate from style targets.
Why might an older border sit differently?
The developers warn that smoother trim placement and corrected tilt can slightly change old creations. In particular, a piece that had a manual correction for an old default offset may now need inspection. Compare the same view before deciding the entire dress is broken. Do not delete a detailed creation simply to test one edge.
If a cuff or complicated shape still fails, retain the original project and record the selected piece, the last successful action and the exact visible symptom. The update compatibility checklist covers that comparison; troubleshooting covers a reproducible report.
Source and scope
Checked 21 October 2026 against October Patch Notes, Build 443. The control descriptions are official. The inspection order is editorial guidance, without firsthand testing or a claim that all cuff interactions are fixed.