What should a print plan decide before cutting?
Pick the area where you want the print to be most readable. A broad skirt panel and a narrow bodice section give a motif different amounts of space. Write a short intention such as “the border should sit near the skirt edge” or “the plain section should frame the floral panel.” These are design goals, not game requirements or guaranteed outcomes.
The official Steam gameplay description says your pattern arrangement on the fabric carries through to the garment. That makes the fabric beneath a paper piece part of the design, not just a background. The cutting guide covers grain indicators and collection. This guide concentrates on the picture that the fabric forms after assembly.
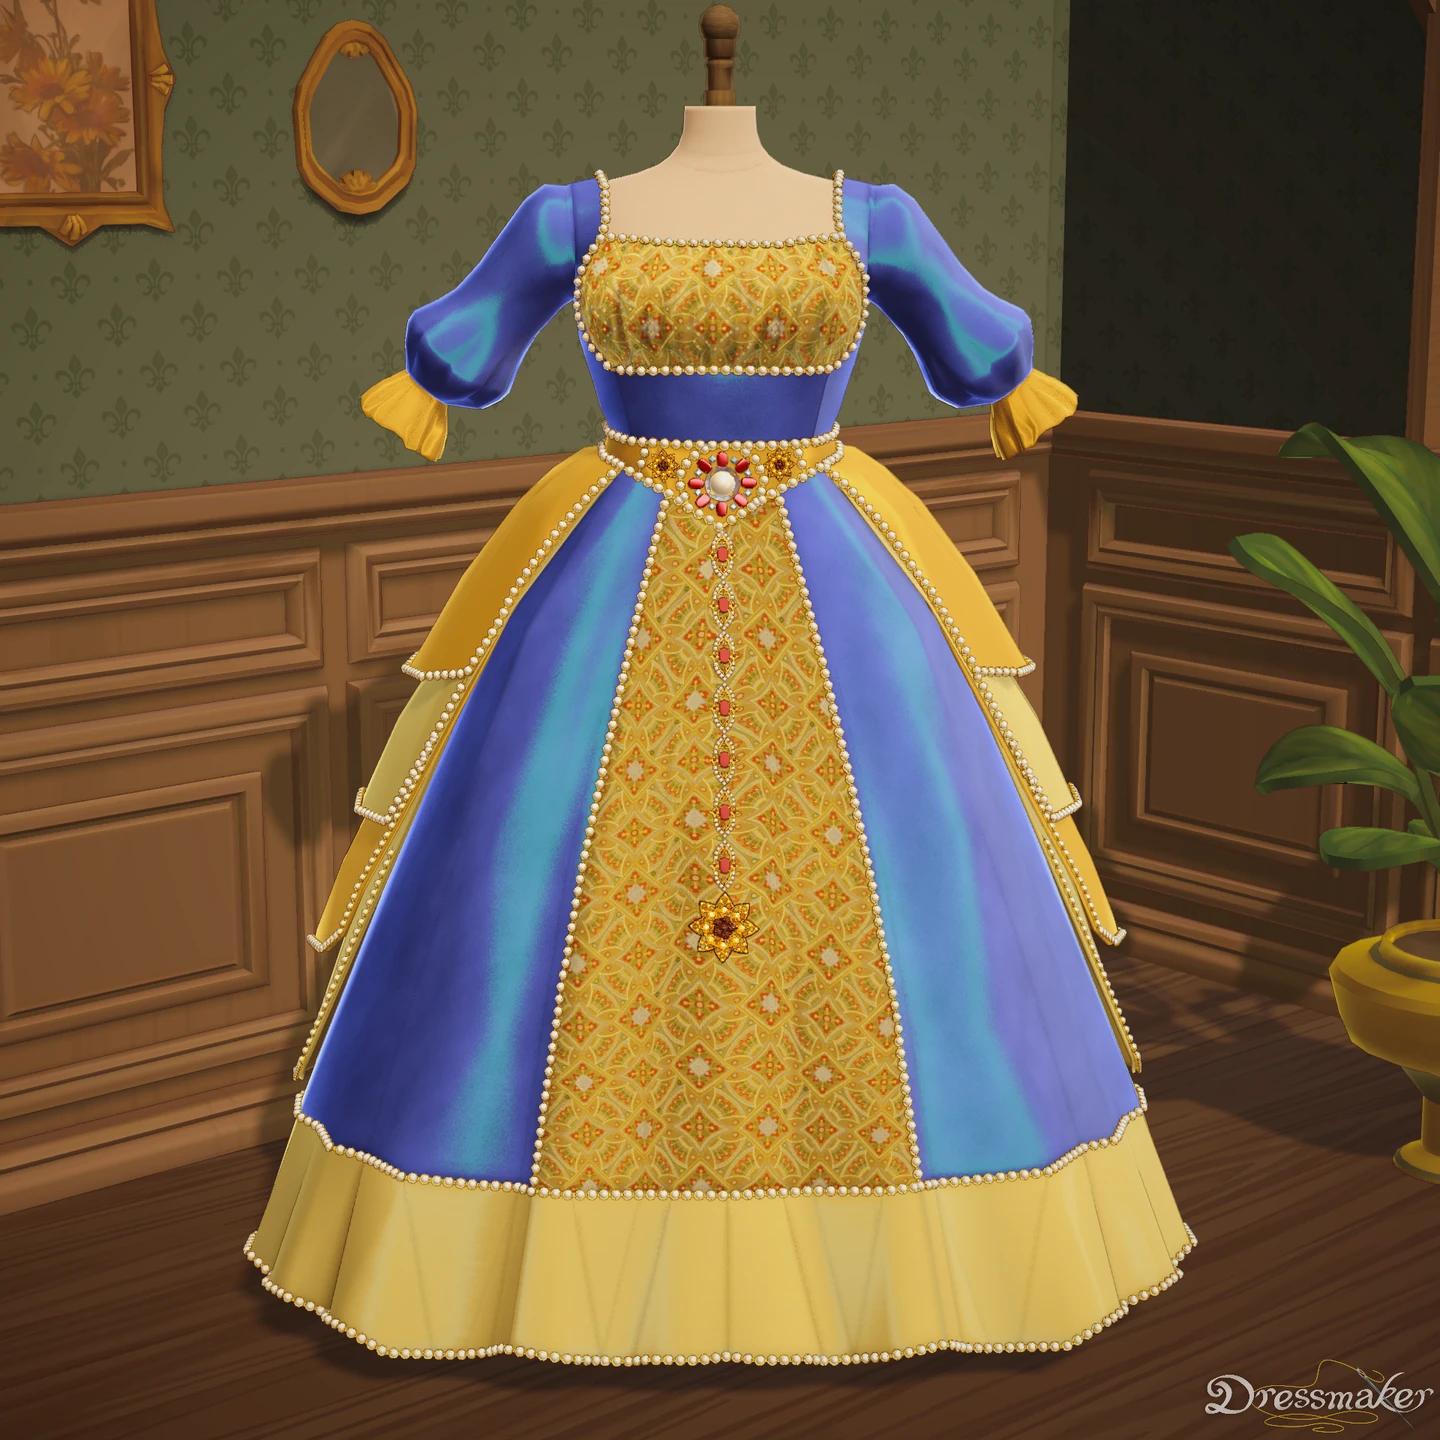
A yellow patterned front area sits between blue side sections in this official July showcase.
- Compare the motif inside the front area with the quieter neighbouring sections.
- The image supports a colour-block observation; use your cutting view for the actual panel and grain checks.
Pre-release media published July 28, 2026. This image does not establish the Build 443 interface or item unlocks.
July showcase creators: blueisasome, Ser Wobbles the Wobbly, DannyMothHere, MothIn30Seconds, CoffeeClearwingMoth, nanda, Wilt and Eli; published by Cozy Lives / Free Lives
Read the original publicationHow do grain and motif placement differ?
| Check | What it answers | What it does not establish |
|---|---|---|
| Grain indicator | How this piece is oriented for the cutting stage | Where a flower lands on the finished bodice |
| Fabric beneath the piece | Which part of the print the panel will use | The final dress quality |
| Adjacent assembled panels | How the selected pieces meet visually | The entire hidden construction or scoring formula |
| Full garment view | Whether the print supports the silhouette | Whether every commission condition is satisfied |
A strong grain reading can coexist with an awkwardly placed motif. A pleasing continuous-looking section can coexist with a missed material requirement. Keep those judgments separate so that you know what to change next.
How can you compare a border print?
Build 443 names Autumnal Vine Border Print Cotton and Spring Vine Border Print Cotton. Their names make them useful candidates to inspect for edge placement, but the patch does not publish repeat measurements or a matching template.
Before cutting, inspect where the border falls inside the intended piece. Compare the direction of the motif with the edge you want to decorate. For a paired design, compare both pieces rather than assuming they sample identical parts of the fabric. After assembly, inspect the meeting point and the opposite view. A match at the front does not establish a match at the back.
If rotating a piece improves the print but worsens its grain reading, record the conflict rather than pretending both goals have been met. The choice depends on the project and its required result. This wiki does not provide a hidden quality penalty or an automatic best rotation.
A worked editorial comparison
Suppose you want a floral skirt framed by a quieter upper section. Keep the component layout steady while comparing two fabrics. On the first pass, inspect the width of the motif on the skirt. On the second, inspect the narrow upper panels. Then decide whether the same print belongs everywhere or whether a plain candidate makes the intended focal area clearer.
This is a planning exercise, not a tested commission recipe. It supplies no required fabric quantity, price or score. The useful result is a named visual difference that you can inspect, rather than changing material, skirt shape and decoration together and being unable to explain the outcome.
How should you record a mismatch?
- Name the component and the panel you meant to change.
- Keep the cutting view and a corresponding assembled view.
- Describe the mismatch: wrong motif section, different direction or interruption at a join.
- Check the neighbouring panel before replacing the whole fabric.
- Repeat the comparison from the same camera angle after one adjustment.
If the expected piece is absent, diagnose missing panels first. A construction gap and a broken visual repeat are different problems. If the material preview looks different under another angle, compare fabric sheen and lighting before concluding that the selected fabric changed.
Where do real examples fit?
The visual design study reads credited player garments as visible design examples. Their screenshots can show repetition, contrast or edge placement. They cannot reveal every panel choice, inventory label or hidden requirement result. Copy an observation you can identify, not an imagined list of component IDs.
Preview and recovery are separate steps
A player asked about print placement and recovery; a reply suggests previewing on the mannequin and scrapping a piece to recover cloth. The discussion does not establish every recovery timing or refund. chaseit’s guide distinguishes a piece scrapped before the fabric is cut away from cloth already discarded. See cutting and grain before discarding.
Sources and limits
Checked 21 October 2026 against the official Steam gameplay description and Build 443 material additions. Comparison steps are editorial. No seamless-print guarantee, unpublished repeat dimension or firsthand test is claimed.